Monday, January 30, 2006
WinFX
WinFX is the next generation development framework for Windows, comprising .NET FX 2.0, Windows Communication Foundation, Windows Presentation Foundation and Windows Workflow. Combined with Microsoft Expression tools and the tools support in VS 2005 and moving forward with Orcas, we have the opportunity to set a new bar for the rapid development of differentiated applications that are more connected, easier to use, resilient and have richer user experience.
Tuesday, January 24, 2006
Blogging from MS Word
Blogger Help : About Blogger for Word
This is just amazing ! Blog from MS Word too good.
I guess i would be using this extensively.
This is just amazing ! Blog from MS Word too good.
I guess i would be using this extensively.
Enterprise Library for .NET 2.0
In this article I would be explaining how to install the Enterprise Library and configure it to use.
Download the Enterprise Library for .NET 2.0 here (January 2006).
The setup file is around 14 MB in size.
The double click the Enterprise Library January 2006.exe file and follow the steps as shown below in the screen shots.
Step 1: click on I accept and click next

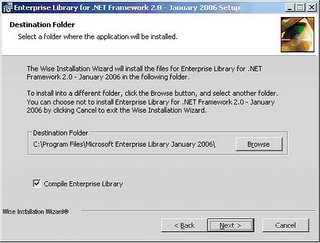
Step 2: check the “Compile Enterprise Library” checkbox. This will actually compile the Enterprise Library application blocks after installing, so that it’s ready to use in your projects. If you don’t check this option then you have to manually compile the application blocks to use them.
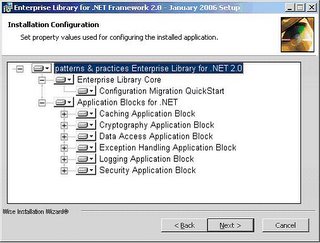
Step 3: Select all the application blocks that you want to install.
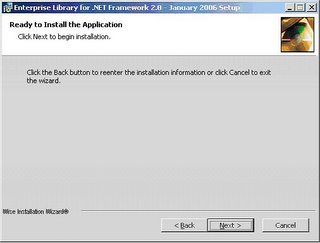
Step 4: Click on Next
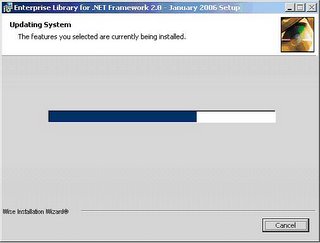
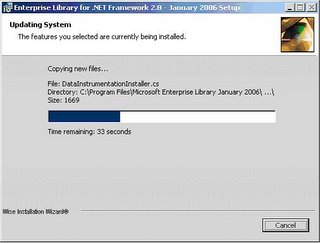
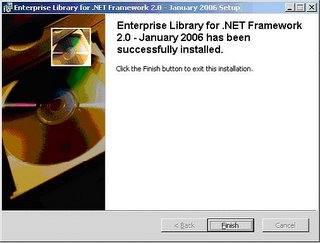
Step 5: Once the installation is complete you should be able to see the successfully installed message as shown below in screen shot.
Once the installation is complete you can find the Enterprise library in Start -> Program files -> Microsoft patterns and practices -> Enterprise Library – January 2006 as shown below in the screen shot.

The following are the application blocks available in Enterprise library for .net 2.0.
1. Caching Application Block
2. Cryptography Application Block
3. Data Access Application Block
4. Exception Handling Application Block
5. Logging Application Block
6. Security Application Block
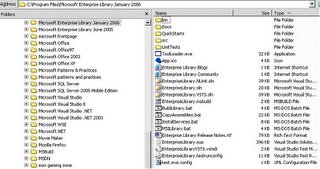
After installing the EntLib (Enterprise Library) you should be able to see the following list of files under the installed folder. (Here I have installed the EntLib on the default path i.e. C:\Program Files). See screen shot below.
So now you have installed the Enterprise Library for .net 2.0 successfully on your machine.
So what’s new in EntLib for .NET 2.0?
What has changed compared to previous version of EntLib?
E.g.: In the previous version of EntLib if you use the logging application block there would be an entry of logging application block in the application specific configuration file i.e. app.config ( or for web web.config) and a separate configuration file with the name of the application block like “loggingconfiguration.config” where as now all the application block specific details would be stored in the app.config (or web.config)
For some of the application blocks quickstarts to work like Data Access Application block quickstart you need to setup the database.
You need to have the SQL Express edition installed in your machine to work on the Data Access Quick starts.
The following are the steps to configure the database for quickstarts.
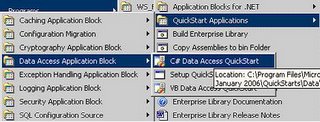
Step 1: under the QuickStart Application -> select Data Access Application Block -> click on “Setup QuickStart Database”.(as shown in screen shot)
Step 2: once you have clicked on the setup, you should see the screen similar to the below one.
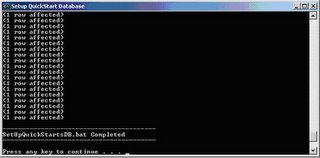
Now the quick start for database application block is setup.
The above database scripts that you executed just now actually create “EntLibQuickStarts” database in your SQL Server Express Edition.
SQL Server Express Edition does not come with the UI tool like SQL server 200 Enterprise Manager which is easy to use and which you can use to see the list of databases you have created, users, roles etc. so you if you are looking for a similar tool for SQL Server Express Edition download the Microsoft SQL Server Management Studio Express (SSMSE) - Community Technology Preview (CTP) November 2005
From here. The setup file is around 30 MB in size.
After you have installed the SQL server management studio successfully, you can open the SSMSE by click on Start -> Program Files -> Microsoft SQL server 2005 -> SQL server Management Studio Express CTP.

After you click on the SSMSE you are asked to enter the credentials as shown below.
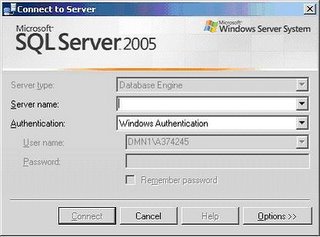
Under Server Name enter your machine name followed by the SQL server instance name.
By default the instance name will be SQLEXPRESS.
Server name eg: localhost\SQLEXPRESS
And under Authentication select Windows Authentication. Click on connect.
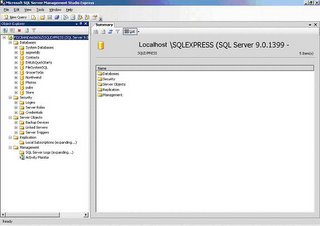
After connecting SSMSE would look something like this.
In my next blog entry i would be explaining more in detail about how to use it in your projects with just few steps.
Download the Enterprise Library for .NET 2.0 here (January 2006).
The setup file is around 14 MB in size.
The double click the Enterprise Library January 2006.exe file and follow the steps as shown below in the screen shots.
Step 1: click on I accept and click next

Step 2: check the “Compile Enterprise Library” checkbox. This will actually compile the Enterprise Library application blocks after installing, so that it’s ready to use in your projects. If you don’t check this option then you have to manually compile the application blocks to use them.

Step 3: Select all the application blocks that you want to install.

Step 4: Click on Next


Step 5: Once the installation is complete you should be able to see the successfully installed message as shown below in screen shot.

Once the installation is complete you can find the Enterprise library in Start -> Program files -> Microsoft patterns and practices -> Enterprise Library – January 2006 as shown below in the screen shot.

The following are the application blocks available in Enterprise library for .net 2.0.
1. Caching Application Block
2. Cryptography Application Block
3. Data Access Application Block
4. Exception Handling Application Block
5. Logging Application Block
6. Security Application Block
After installing the EntLib (Enterprise Library) you should be able to see the following list of files under the installed folder. (Here I have installed the EntLib on the default path i.e. C:\Program Files). See screen shot below.

So now you have installed the Enterprise Library for .net 2.0 successfully on your machine.
So what’s new in EntLib for .NET 2.0?
- Configuration is now based on the System. Configuration namespace
- Logging Application Block uses the System. Diagnostics
- Introducing Object builder which does the necessary tasks for creating objects.
What has changed compared to previous version of EntLib?
- Configuration Application Block in previous version no longer exists.System.Configuration namespace provides the configuration functionality
- The EntLib would store all its configuration settings in the application configuration file i.e. App.config file rather than storing the configuration in application specific configuration files. So you can see less number of config files in EntLib 2.0.
E.g.: In the previous version of EntLib if you use the logging application block there would be an entry of logging application block in the application specific configuration file i.e. app.config ( or for web web.config) and a separate configuration file with the name of the application block like “loggingconfiguration.config” where as now all the application block specific details would be stored in the app.config (or web.config)
For some of the application blocks quickstarts to work like Data Access Application block quickstart you need to setup the database.
You need to have the SQL Express edition installed in your machine to work on the Data Access Quick starts.
The following are the steps to configure the database for quickstarts.
Step 1: under the QuickStart Application -> select Data Access Application Block -> click on “Setup QuickStart Database”.(as shown in screen shot)

Step 2: once you have clicked on the setup, you should see the screen similar to the below one.

Now the quick start for database application block is setup.
The above database scripts that you executed just now actually create “EntLibQuickStarts” database in your SQL Server Express Edition.
SQL Server Express Edition does not come with the UI tool like SQL server 200 Enterprise Manager which is easy to use and which you can use to see the list of databases you have created, users, roles etc. so you if you are looking for a similar tool for SQL Server Express Edition download the Microsoft SQL Server Management Studio Express (SSMSE) - Community Technology Preview (CTP) November 2005
From here. The setup file is around 30 MB in size.
After you have installed the SQL server management studio successfully, you can open the SSMSE by click on Start -> Program Files -> Microsoft SQL server 2005 -> SQL server Management Studio Express CTP.

After you click on the SSMSE you are asked to enter the credentials as shown below.

Under Server Name enter your machine name followed by the SQL server instance name.
By default the instance name will be SQLEXPRESS.
Server name eg: localhost\SQLEXPRESS
And under Authentication select Windows Authentication. Click on connect.
After connecting SSMSE would look something like this.

In my next blog entry i would be explaining more in detail about how to use it in your projects with just few steps.
Monday, January 23, 2006
Monday, January 16, 2006
.NET 2.0 Quickstarts
Today i installed the quickstarts that comes with the .NET 2.0 SDK.
Here are some quick walkthrough of how to install the quickstarts.
Make sure you have SQL Express Edition installed in your machine before you start installing the quickstarts, since SQL express is required for the quickstarts.
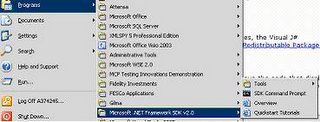
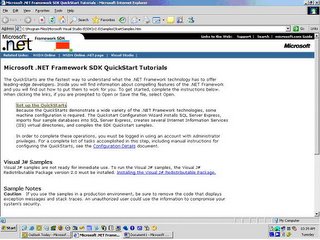
Step1: Click on Start -> Programs -> Microsoft .NET Framework SDK 2.0 -> click on QuickStart Tutorials.
Step 2: When you click on Quickstart tutorials you should be able to see the a webpage as shown below. Click on "Set up the quickstarts" link.
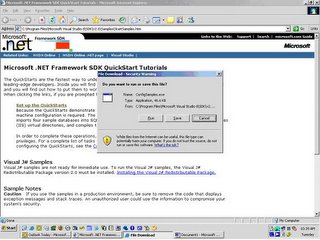
Step3: You will get a dialogbox as shown below , click on Run.
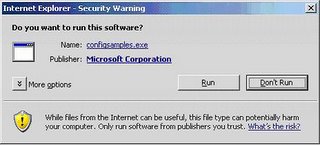
Step 4: After clicking on run, you will get a diaglog box like this , just click on Run again.
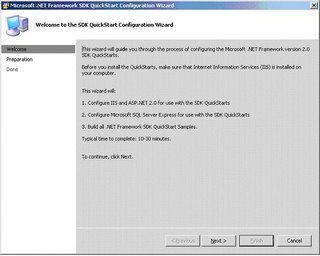
Step5: After clicking on Run, you should be able to see the below screen, just click on next.
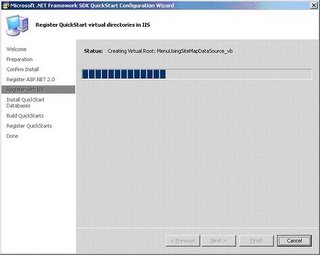
Step 6:After clicking on Next button, the installation of Quickstarts tutorials begins.
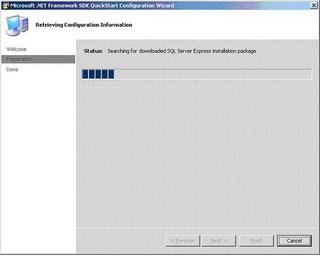
Step 7: you should see the following screen while the installtion is started.
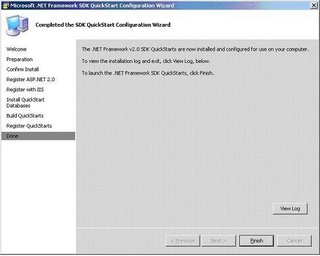
Step 8:Once the installation is complete you should see the below screen.
Here are some quick walkthrough of how to install the quickstarts.
Make sure you have SQL Express Edition installed in your machine before you start installing the quickstarts, since SQL express is required for the quickstarts.
Step1: Click on Start -> Programs -> Microsoft .NET Framework SDK 2.0 -> click on QuickStart Tutorials.

Step 2: When you click on Quickstart tutorials you should be able to see the a webpage as shown below. Click on "Set up the quickstarts" link.

Step3: You will get a dialogbox as shown below , click on Run.

Step 4: After clicking on run, you will get a diaglog box like this , just click on Run again.

Step5: After clicking on Run, you should be able to see the below screen, just click on next.

Step 6:After clicking on Next button, the installation of Quickstarts tutorials begins.

Step 7: you should see the following screen while the installtion is started.

Step 8:Once the installation is complete you should see the below screen.

Monday, January 09, 2006
Recovering Shift+Deleted Mails from outlook
1) Go to Run and type regedit
2) Go to:
\HKEY_LOCAL_MACHINE\SOFTWARE\MICROSOFT\EXCHANGE\CLIENT\OPTIONS registry key.
3) Right click options and add new DWORD VALUE (data type is REG_DWORD) and then right click and rename to DumpsterAlwaysOn. It is case sensitive.
4) Then right click and modify the value to 1 to turn the Recover Deleted Items menu choice on for all folders or enter 0 to turn it off.
5) Then go to Outlook , choose "Recover deleted items" option from the Tools
Menu to get back your "permanently deleted" mails!
Wednesday, January 04, 2006
MSBuild for .NET 1.x - MSBee
good news !!!.
In an effort to support 1.x, Microsoft MsBuild team will be targetting 1.x. Project name is MSBee, which stands for MSBuild Everett Environment.
Everett was the code name for Visual Studio 2003.
Though the release date of the same has not been fixed, but still hoping to get it released by june, 2006 something with the release of longhorn
Tuesday, January 03, 2006
Application Generation Comes of Age - The Code Project - Product Showcase
Application Generation Comes of Age - The Code Project - Product Showcase:
"“Every minute spent on infrastructure programming is a wasted minute.”
-Juval Lowy, .NET Software Legend, April 2003"
"“Every minute spent on infrastructure programming is a wasted minute.”
-Juval Lowy, .NET Software Legend, April 2003"
Subscribe to:
Posts (Atom)
